Downsizing has its benefits. We now get 21 to 23 mpg around town and over 30 mpg on the highway. Its also much easier to get in and out of our new van.
One of the odd things has been parking. Even though Sparty was large, parking him had become easy. Parking our new van has been taking several attempts to get it between the lines.
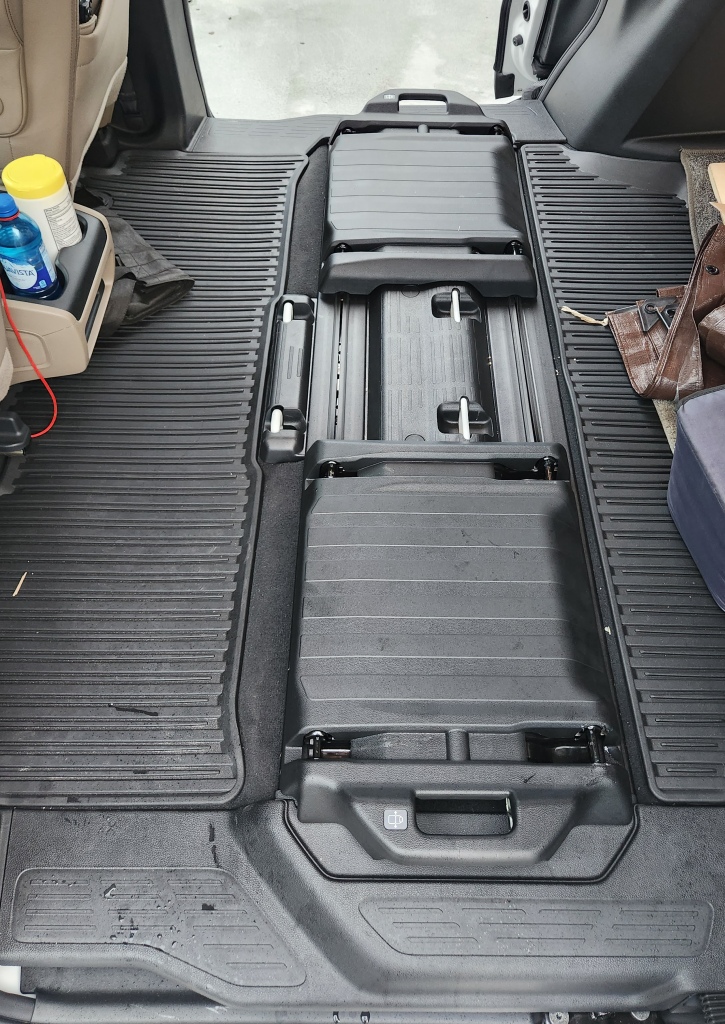
When looking to use our new van as a camper, there is a real weakness: the floor. It is not flat. There are mounts for the center side sliding seats, an elevated foot area for the third row and then another bump up when the rear seats are folded down.
Honda has apparently given up on their minivan also being a good cargo mover. That stopped us from just tossing a pad in the back in going camping. We needed a design and install something for sleeping.
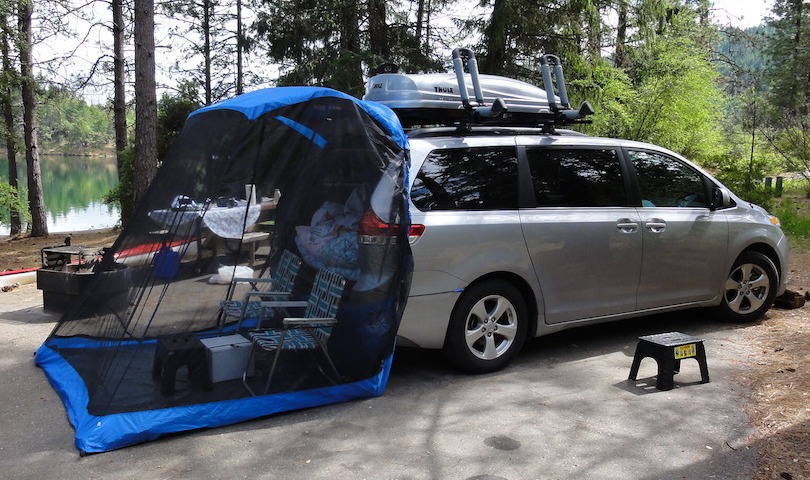
Most people choose to put their sleeping arrangements configured front to back. This does allow one to have a bed as long needed. Some place it at the back and add a TailVeil for added space.
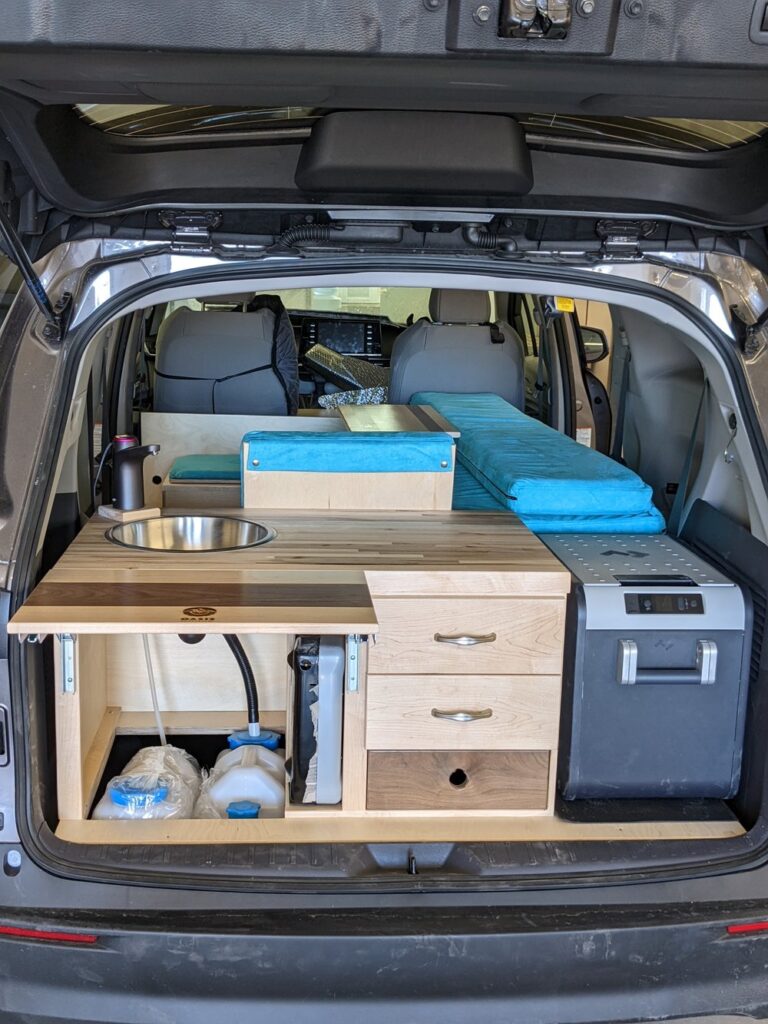
Others choose to have a kitchen out of the back and the bed further forward.
For us it seems that front to back bed just took too much of the now very limited space we had. We opted for a different approach
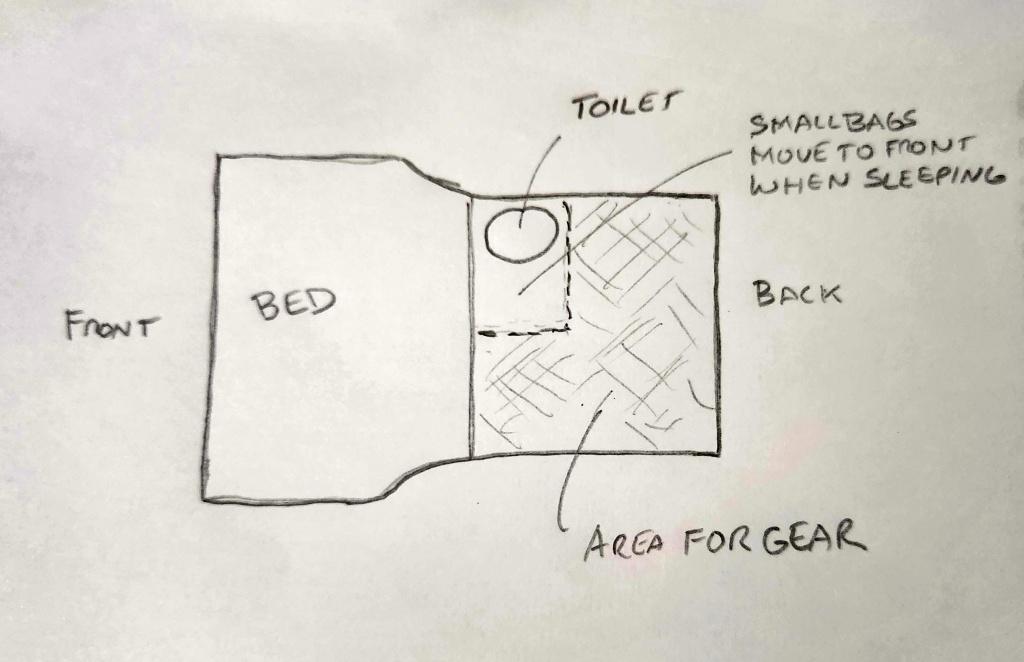
Sleeping crossways between the sliding doors does offer us a lot of space in the back for storage. But it did limit our sleeping length to 64 inches. At 5’10” it is barely enough for me. I cannot stretch out. Mrs Ram has plenty of room.
Setting our bed this way meant we could keep our portable toilet (our same old trusty bucket one). Camping gear could fill the back and be easily accessed from outside.
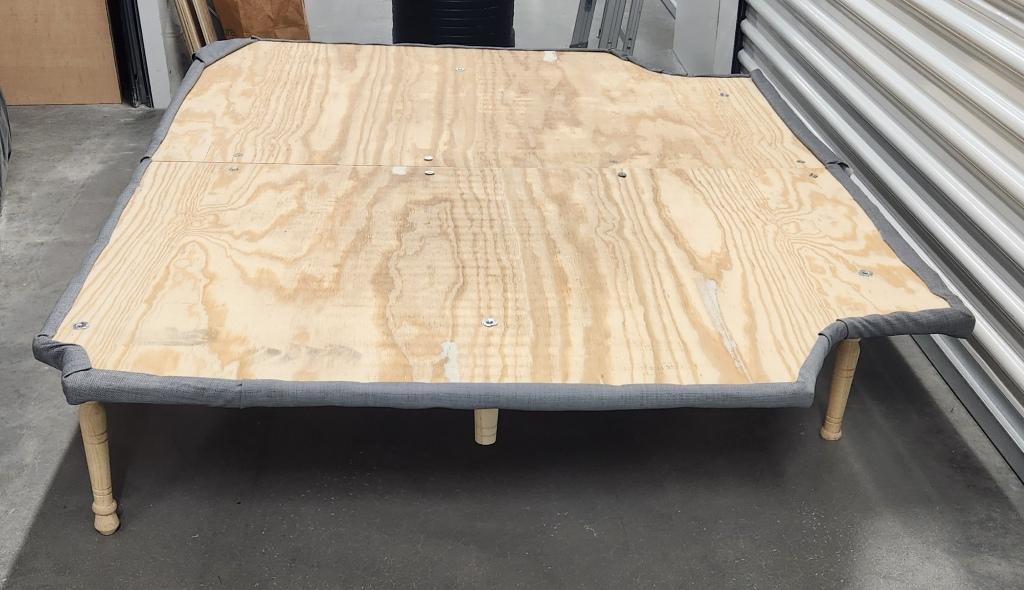
But first we had to build a flat platform to have a flat place to put a mattress.
Making this presented a challenge for someone who now lives in a condo. Yes I have a circular and could borrow a couple of saw horses. And Home Depot does give you two cuts free. I was lucky that a friend volunteered his garage and tools making it much easier.
Since we are no longer Nomads and would be sleeping in the van only a few days a month, our platform had to be easily installable and removable so that we could use our van as a people mover the rest of the time. Making it in several pieces and having it screw together made sense for this.
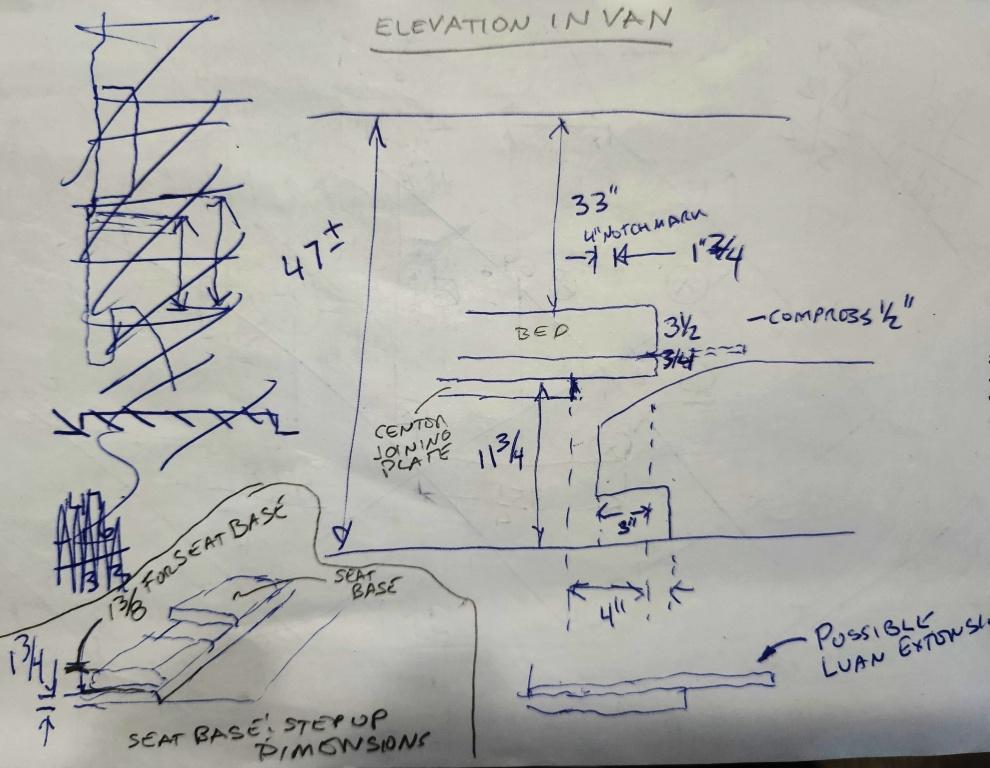
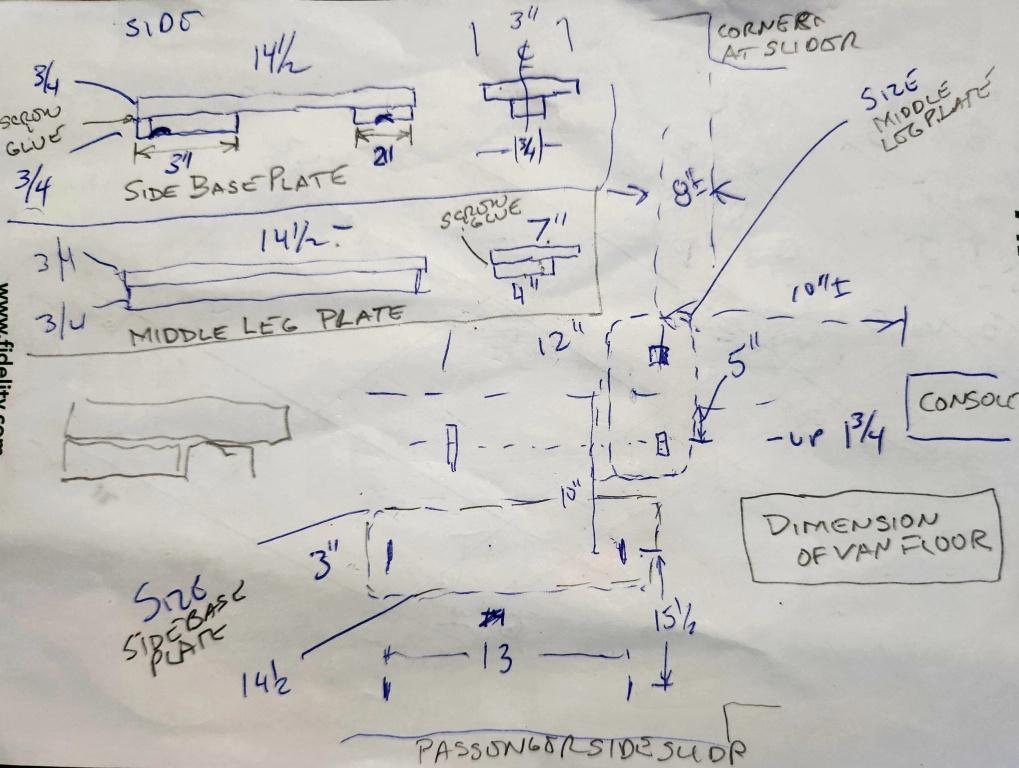
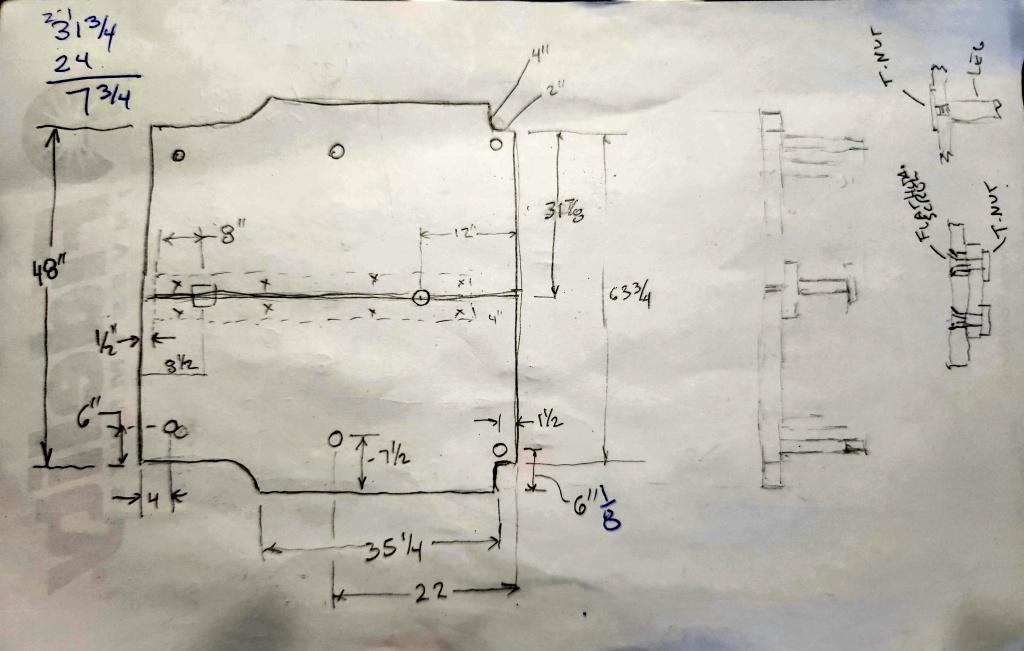
With all of the different levels on the floor it seemed that making a table-like platform would work best. The platform is made from (2) 3/4″ plywood sections with a 3/4 plywood joining pieces. The platform is split in half to cover as much space as possible for the bed while also reducing the weight of each piece. Each piece had to be contoured to fit the sliders, seats, center console and plastic sides in the back. Even though we started with cardboard templates, there was still a lot of trial and error to get the right fit.
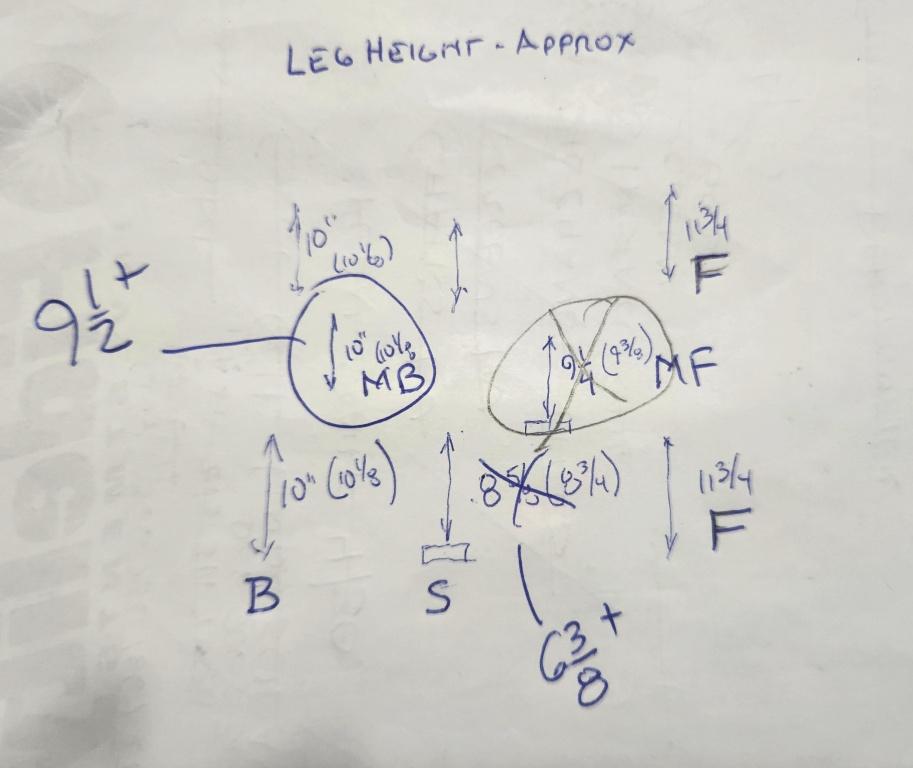
Legs of vary lengths produce a level platform with about 8 to 11″ of storage underneath and about 33″ of head room over the bed.
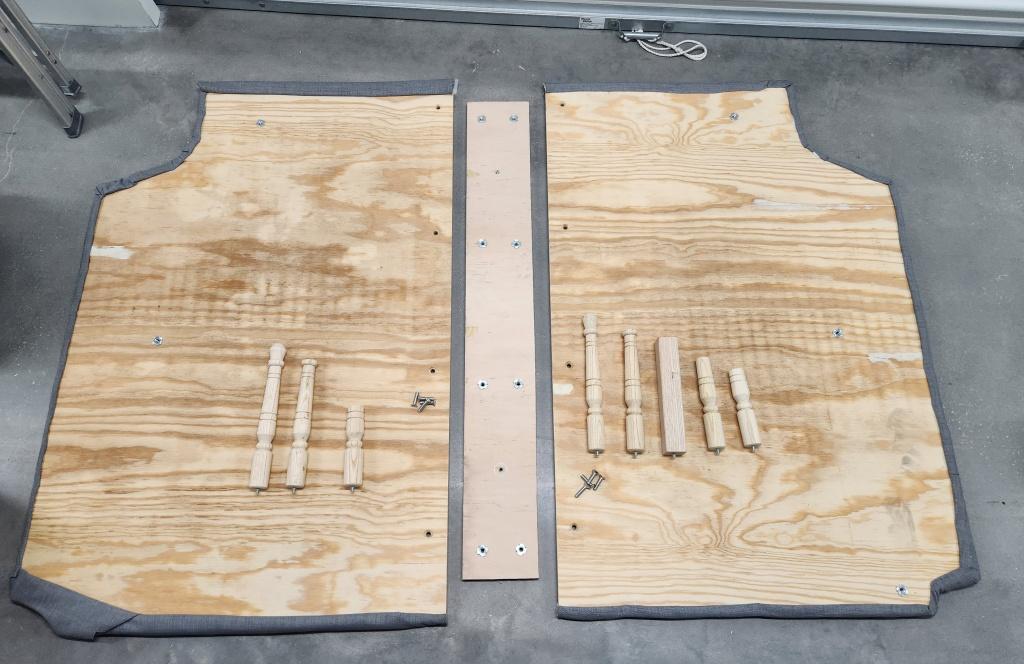
To install this, I made three plates for the center legs to rest on and them on the center slider platform
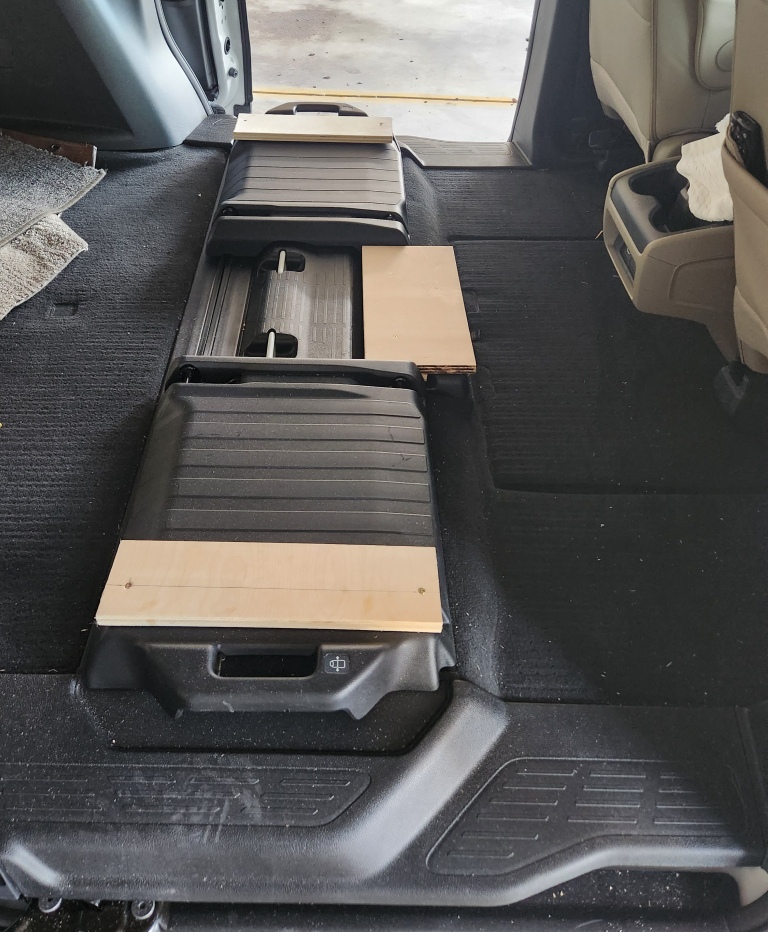
The legs are screwed into the T-nuts in each plywood piece. The center piece is attached to one side with screws through the T-nuts and then installed through the slider. The other plywood piece is placed in through the slider and attached.
What is the material list for this in case you want to make one yourself?
- 2 sheets 3/4″ Plywood
- 7 legs with 5/16-18 hanger bolt
- 1 more leg with 5/16-18 hanger bolt
- 16 5/16-18 T-nuts 5/8 long
- 8 5/16-18 Screws 1 1/4″ long
I would have used 8 identical legs but my initial design only called for 6 so I ordered 7. Home depot would not let me order just one leg so I had to get something from Amazon for that last leg.
If you are looking for more details, here are my original sketches. They include best guesses at leg heights, the addition of three plates for those huge seat center seat slides and making sure the platform is high enough to clear that long front center console.